The Art of the Shibazi Bracelet: DIY Guide to Crafting the Eighteen Beads Treasure
Introduction: Meaning of the Shibazi Bracelet
The Shibazi Bracelet, meaning “Eighteen Beads,” is more than just a piece of jewelry; it is a profound item steeped in Buddhist philosophy and Chinese imperial history. Unlike the lengthy Buddhist malas, the Shibazi is a wrist-worn prayer bead style popularized by literati and royalty in the Qing Dynasty.
In Buddhism, the number eighteen (十八) represents the Eighteen Realms (Shibajie), which encompasses the entire scope of experience:
- Six Sense Organs (Six Roots): Eye, ear, nose, tongue, body, and mind.
- Six Objects of Sensation (Six Dusts): Form, sound, odor, taste, touch, and mental objects.
- Six Consciousnesses (Six Vijñānas): Consciousnesses related to each of the six organs.
Thus, the Shibazi Bracelet symbolizes a complete and harmonious world, embodying a powerful blessing for peace and good fortune.
While the court used the larger court beads (Chaozhu) for formal ceremonial dress, the Shibazi offered a more personal and flexible adornment, often worn on the wrist or elegantly attached to a coat button or lapel. This freedom made it a favorite among scholars and fashionable nobles.
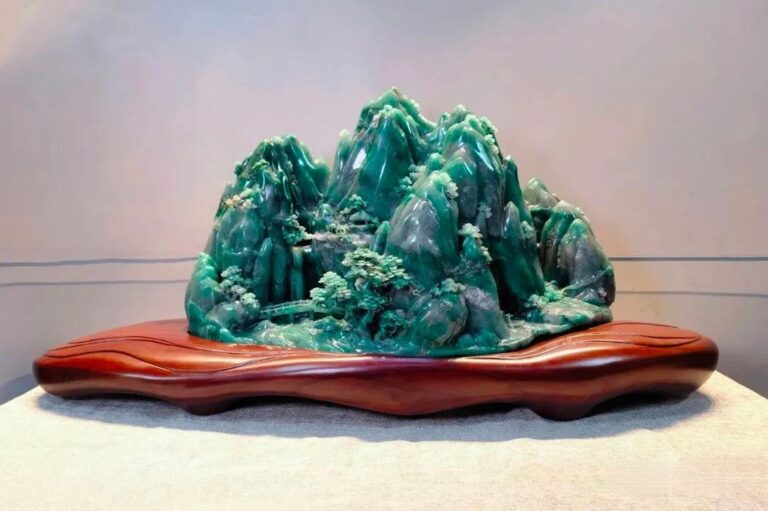
To show you how to recreate this exquisite tradition, we are basing our project on a stunning Qing Dynasty jade Shibazi piece, which fetched 1.725 million RMB at a 2011 Poly Auction! (Don’t worry, we won’t be using materials quite that expensive!)
Ready to create your own symbol of grace and wisdom? Let’s gather the materials and begin crafting your beautiful Shibazi Bracelet.
Part One: Materials and Tools You Will Need

To craft your custom Shibazi Bracelet, which is modeled after the classic Qing Dynasty style, prepare the following items:
🔨 Gathering Your Shibazi Bracelet Materials
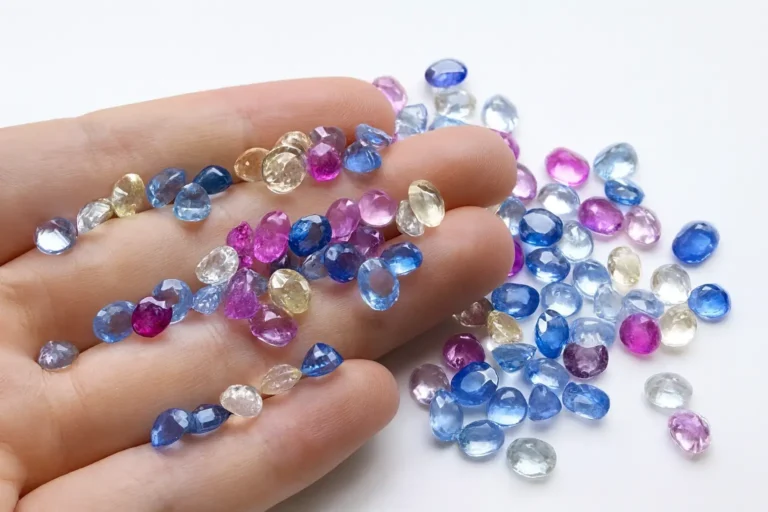
- 18 x Hetian Jasper (Jade) Beads
- 3 x Pink Tourmaline-colored Antique Glazed Glass Beads
- 1 x Buddha Head and Pagoda Set
- 1 x Pink Tourmaline-colored Glazed Glass Lock Pendant
- 2 x Pendant Corners (or Drops)
- 1 x 925 Silver Vajra (Dorje) Pendant
- A selection of small, 1.5–2mm Pearl Beads
- 1 x Length of Beading Thread (Buddha Bead Thread)
- 1 x Roll of White Three-strand Pearl Thread
⚙️ Essential Shibazi Bracelet Tools
- Shaping Glue (Clear setting glue)
- Small Pliers
- Tweezers
- Scissors
- Lighter (for sealing ends)
Part Two: Creating the Intricate Pearl Flower Balls
This first step—creating the delicate pearl flower balls (or clusters)—is often the most intricate and frustrating part of making the Shibazi Bracelet. Precision is absolutely key here!
1. Preparation and Essential Knotting
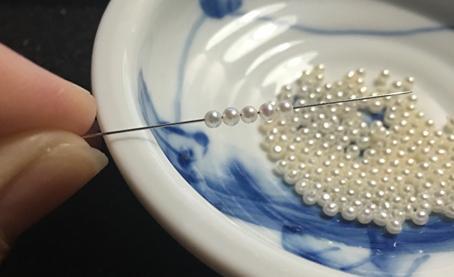
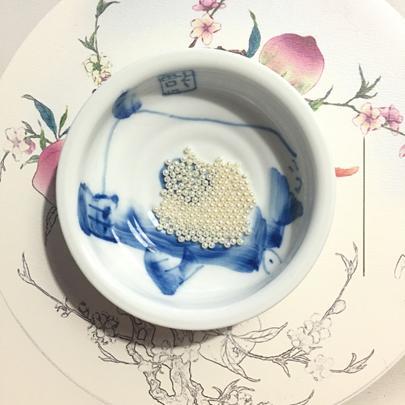
- Select Your Pearls: You must carefully select 15 pearls of the same size and the closest to perfectly round, as one flower ball requires 15 pearls. This initial selection step is crucial; even the best knotting technique cannot compensate for uneven pearls. (For reference, we select the best pearls from hundreds of necklace-grade beads for just a few perfect clusters.)
- Knot the Base Rings: String five pearls together. Tie a secure square knot, ensuring you leave 4–5 cm of thread extending from both ends. Repeat this process to create three separate pearl rings, as one flower ball requires three layers.
Pro-Tip: Mastering the Threading
- Tip A (The Hardening Trick): To easily thread the stiff pearl line through tiny pearl holes (1.5mm), first dip the leading 1 cm of the thread into the shaping glue. Wait ten to fifteen seconds until the glue is nearly dry, then run your fingers along the thread to stiffen it. This simple method eliminates the need for a fiddly pearl needle!
- Tip B (Knot Security): Furthermore, after tying any knot, dip a needle into the shaping glue and carefully apply a tiny dot to the knot. This prevents the knot from unraveling under tension.
2. Assembling and Securing the Three Layers
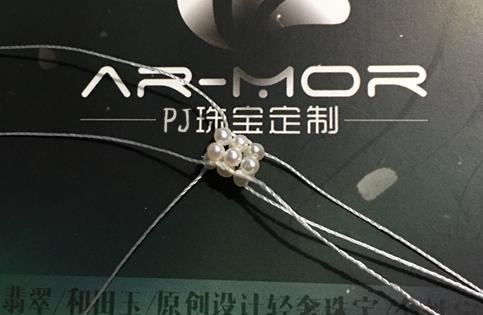
- Assemble the Layers: Now, take one ring to serve as the middle layer and another as the bottom layer. Crucially, stagger the rings so the knots do not align. Use one of the threads extending from the middle ring to firmly knot it to the bottom ring, specifically securing the knot between two pearls. Pull the knot tightly and apply a dot of glue.
- Complete the Initial Stack: Next, use the third pearl ring as the top layer, again ensuring the knots are staggered relative to the layers below. Use the remaining upward-facing thread from the middle layer to knot the top ring securely. At this stage, the three rings are bound, but the structure is not yet stable.
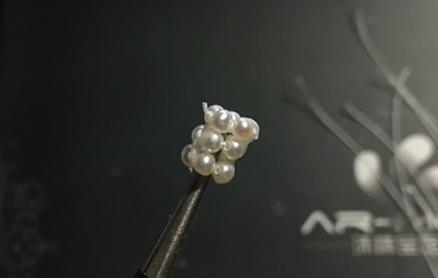
3. Reinforcing and Finishing the Flower Ball
- Reinforce the Structure: You must now secure the flower ball to create a solid structure. Use the two threads remaining from the top ring to knot downwards, tying them firmly to both the middle and bottom layers. Simultaneously, use the two threads from the bottom layer to knot upwards, securing the middle and top layers. This crucial weaving process ensures the three layers are completely solid and durable.
- Finish the Ends: Once the three layers are securely tied, trim the excess threads. Hold the flower ball carefully with tweezers and use the lighter to quickly seal the thread ends. Be extremely cautious: under no circumstances should you burn the threads completely or scorch the pearls.
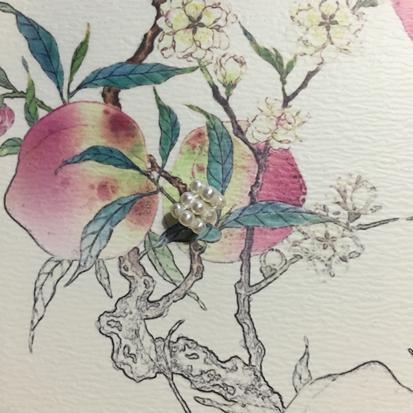
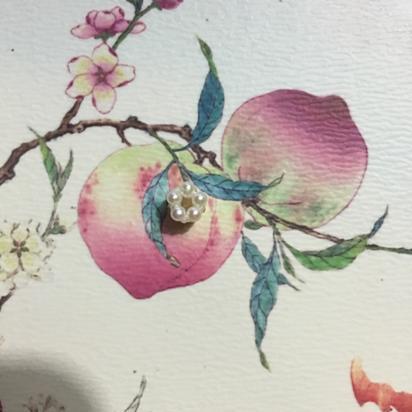
A well-made pearl flower ball should look neat and uniform from every angle.
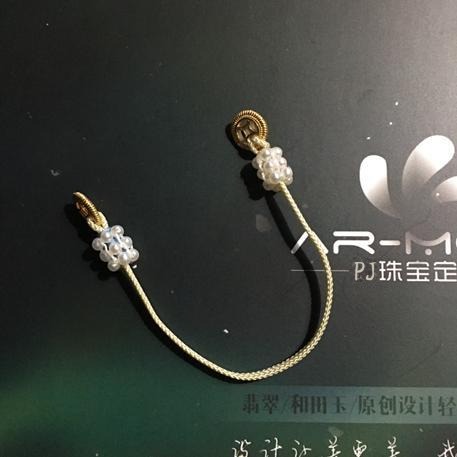
Part Three: Constructing the Elegant Hanging Loop
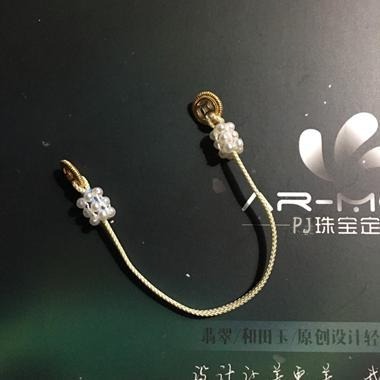
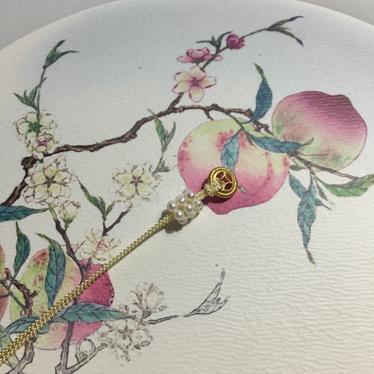
Many people wonder about the function of the cord loop near the Buddha head on a Shibazi Bracelet. In the past, the wearer often attached the bracelet to a garment’s button—for example, on the second button of a straight-collared coat or near the armpit button of a gown—rather than just wearing it on the wrist.
Here is how you assemble the independent hanging loop:
(Note: We are using a blue thread for demonstration purposes to make the coiling process easier to visualize.)
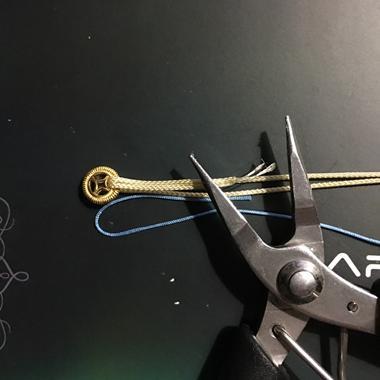
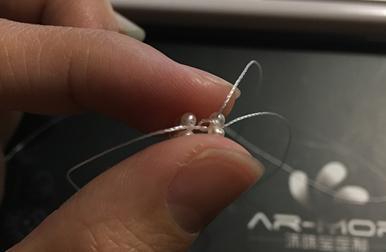
- Thread the Components: Fold the Beading Thread in half. Loop the folded end through one hanging ring and secure it with a knot. Thread the two strands of the Beading Thread through the two pearl flower balls you just created.
- Prepare for Coiling: Pass the ends of the Beading Thread through the second hanging ring and fold them back. Take a length of Pearl Thread, fold it in half, and place it alongside the main Beading Thread. This small loop will secure the wrapping later.
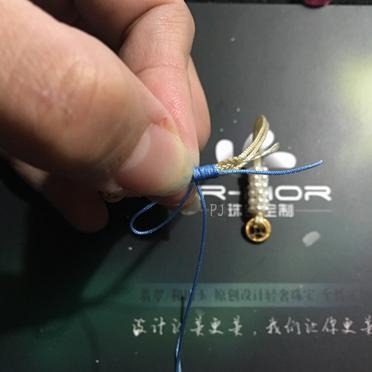
- Perform the Coiling (Wrapping): Take the long end of the Pearl Thread and start wrapping the thread tightly, beginning about 8mm from the hanging ring and coiling toward the ring.
- Secure the Coil: When you reach the desired length near the ring, thread the wrapping thread end through the small loop you left earlier. Pull both ends of the loop to tighten the knot beneath the coil. Use small pliers if necessary to firmly cinch the thread.
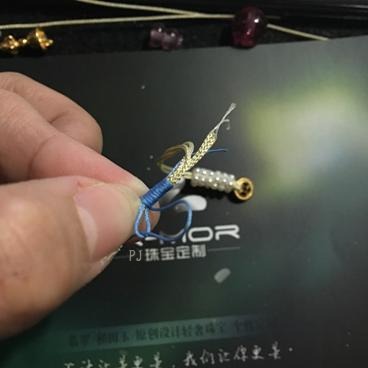
- Trim and Conceal: Trim the excess thread and seal the end with the lighter. Gently push the pearl flower balls over the coiled section to conceal the wrapping, completing the elegant hanging loop. (The wrapping should be snug against the hanging ring, allowing the flower ball to cover the sealed knot.)

Part Four: Stringing and Finishing the Shibazi Bracelet

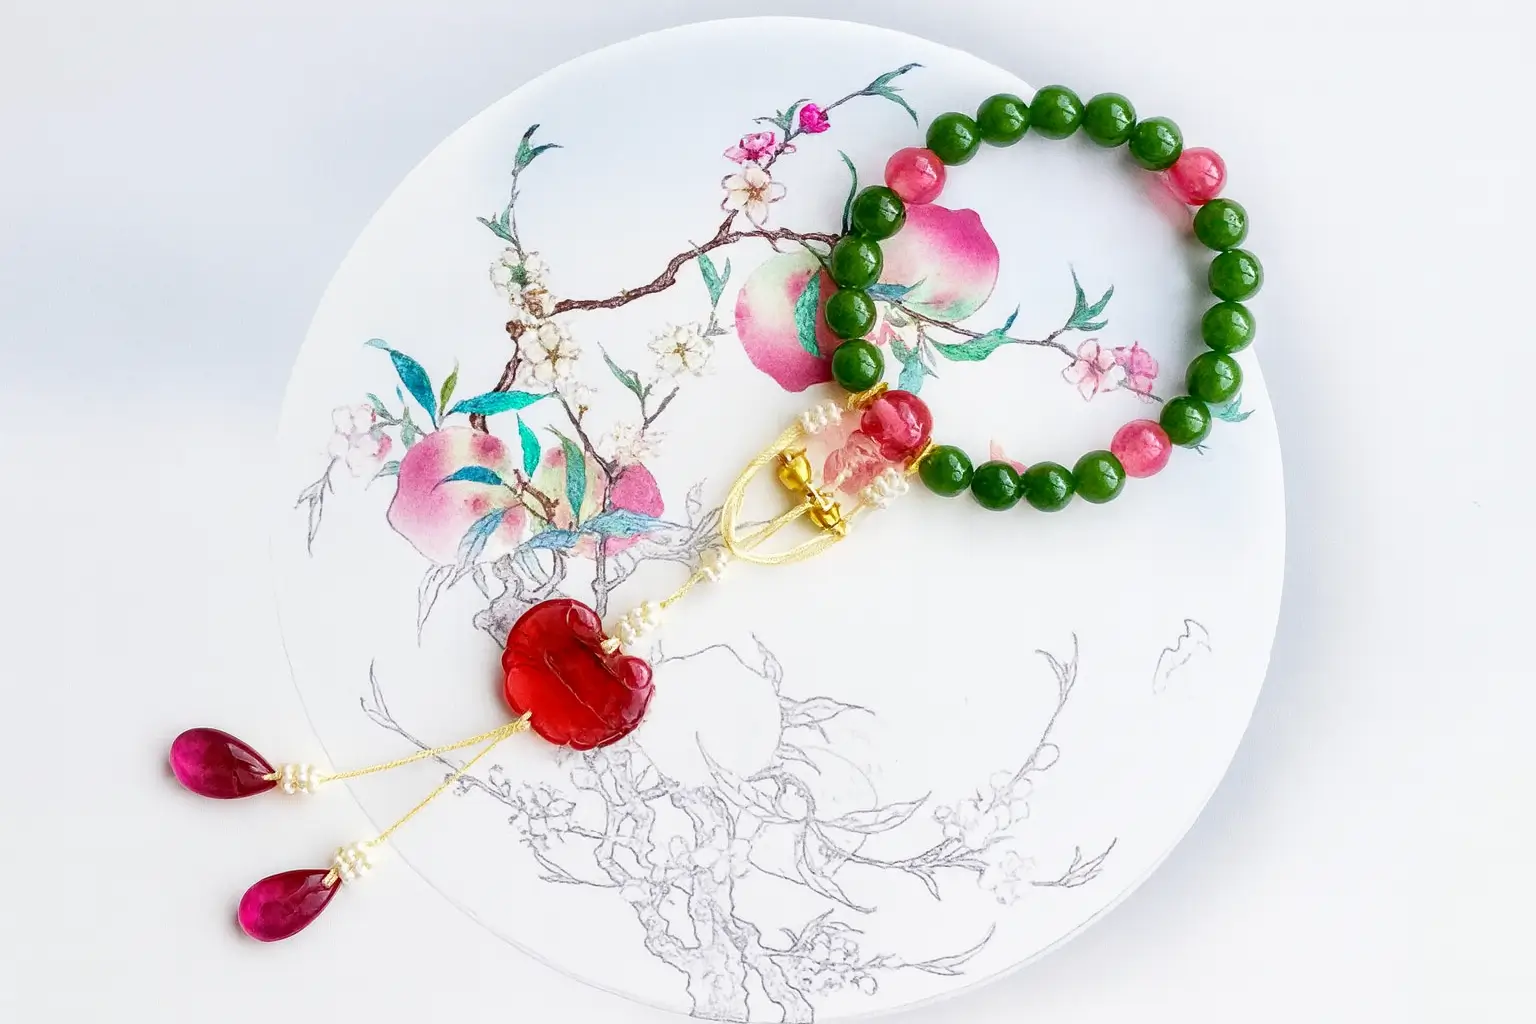
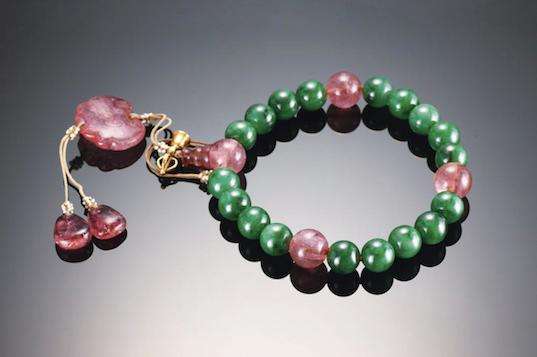
The final step is to assemble the main body of the Shibazi Bracelet using the 18 jade beads and the decorative elements.
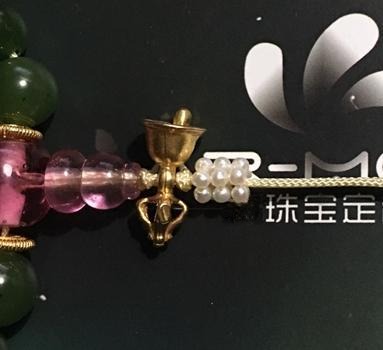
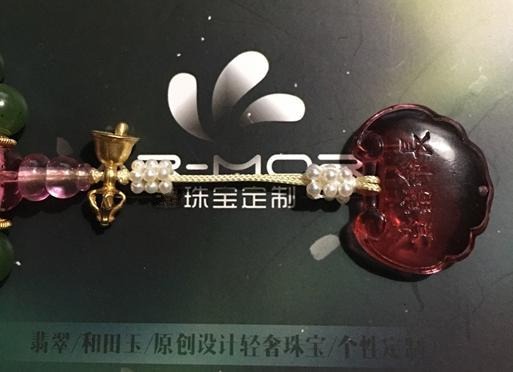
- String the Main Beads: Thread the main beads onto the cord in the desired pattern. When you reach the Buddha head section, thread the cord first through the center of the Hanging Loop you just made, and then thread both lines through the three-holed Buddha Head.
- Secure the End: Thread the lines through the Pagoda and secure it with a tight Chinese knot, such as a Vajra Knot (Diamond Knot / Jingang Knot), known for its durable, symbolic strength,to fix the components. If you are using a silver Vajra, you can brush a layer of transparent nail polish on the bell before threading to slow down tarnishing and oxidation. (Ignore this if you use pure gold.)
- Add the Drops: Thread the two pearl flower balls onto the ends of the Pagoda cord. Pass the cord ends through the Glazed Glass Lock Pendant. Use the coiling/wrapping technique described in Part Two (Steps 3-5) to secure the Lock Pendant in place.
- Finishing Touches: Trim the excess thread and seal the end with the lighter. Gently slide the pearl flower balls down to conceal the finished wrapping. Finally, thread the cord ends through the Vajra and the two pendant corners, securing them with wrapping.
Your exquisitely handcrafted Shibazi Bracelet is now complete!
💍 Explore the Brilliance: PeonyJewels Custom Design Service
This guide provides the steps for an authentic Qing-style Shibazi Bracelet. If you wish to commission a piece without the hassle of knotting those tiny pearls, PeonyJewels offers bespoke jewelry services.
Whether you are looking to prepare the materials yourself or are interested in a fully finished, custom-designed Shibazi Bracelet, our PeonyJewels Custom Design Service is here for you. Visit our site to explore our collection of original, hanmade vintage earrings and accessories and let us help you transform tradition into a timeless treasure!