Gemstone Cutting: From Rough Stone to Radiant Faceted Gem
Introduction
When you admire a piece of gemstone jewelry, you’re often captivated by its dazzling color. Yet, it’s the precision of gemstone cutting that truly brings the stone to life. This delicate art transforms an unremarkable rough stone into a sparkling, faceted masterpiece.
At Peonyjewels, we’ve always wanted to show this transformation — the journey of a plain, rugged crystal becoming a radiant treasure through the hands of a master gem cutter.
Each step in this process carries the devotion, skill, and patience of everyone involved. Every facet is a story of craftsmanship — and nothing about it comes easy.
The Gemstone Cutting Process
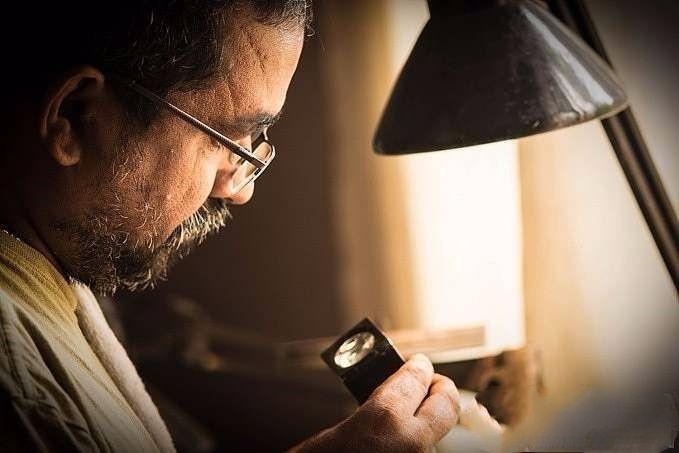
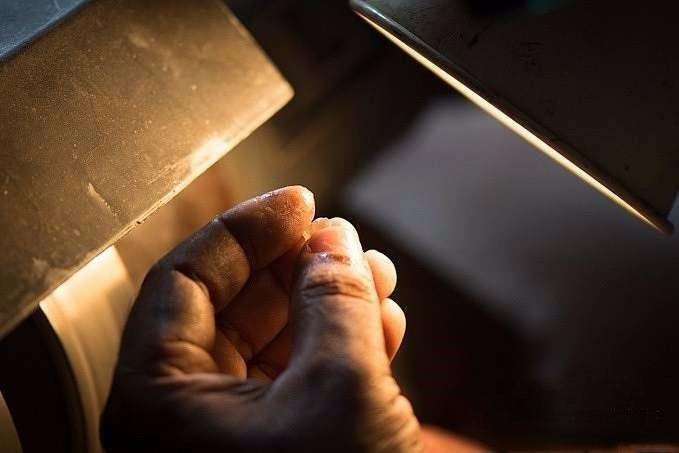
As the morning sunlight filtered through the window, it illuminated the face of my mentor— a man whose wrinkles tell countless stories. With his long beard and calm demeanor, he exudes both wisdom and serenity.
The craftsman in the photo is my mentor, a gem cutter who worked in Los Angeles for many years. On the city’s famed jewelry street, his name is known to all. Every cut in gemstone crafting demands precision — one wrong move, and there’s no way back.
He has cut everything from ordinary gems to stones destined for Cartier and other fine jewelry houses. His experience is nothing short of extraordinary.
I am deeply grateful that he took time out of his busy schedule to help me document this entire process.
Rough Stone Display
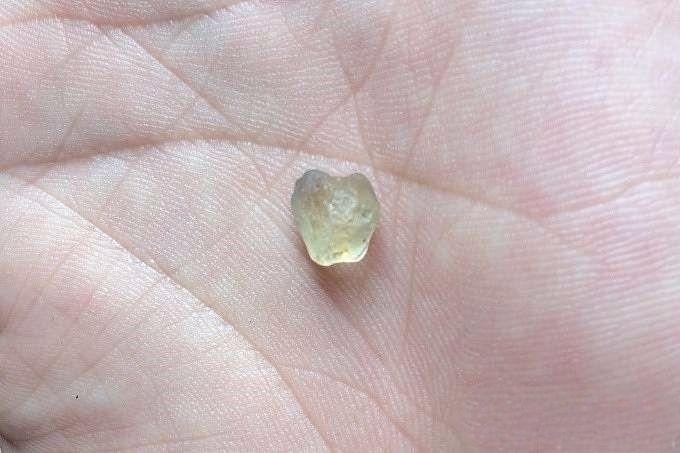
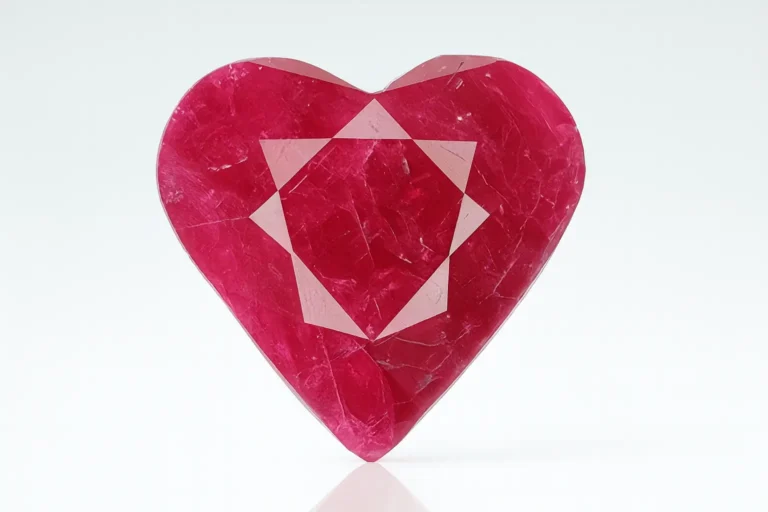
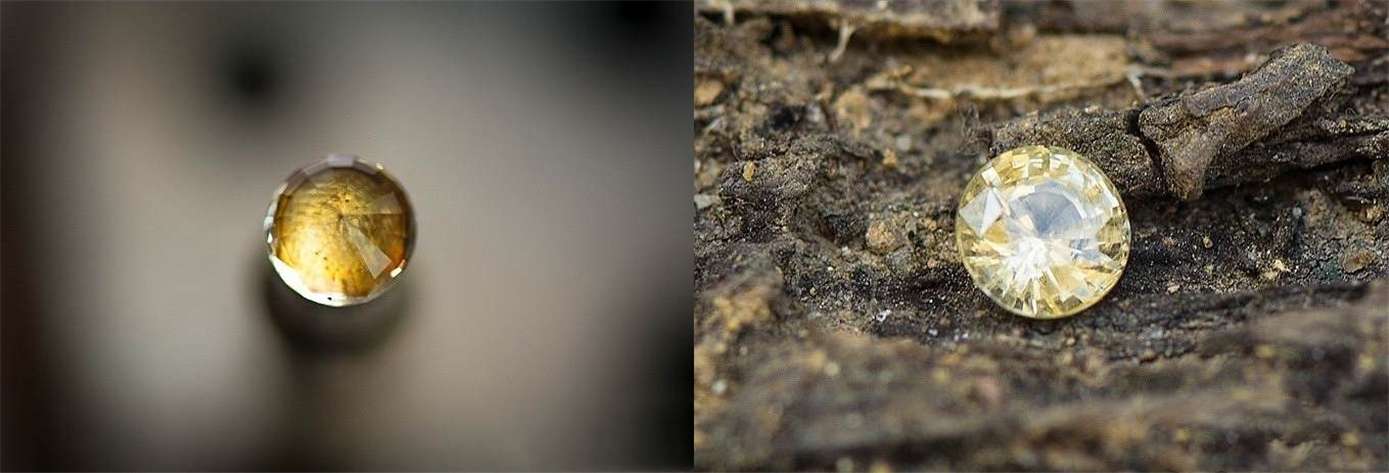
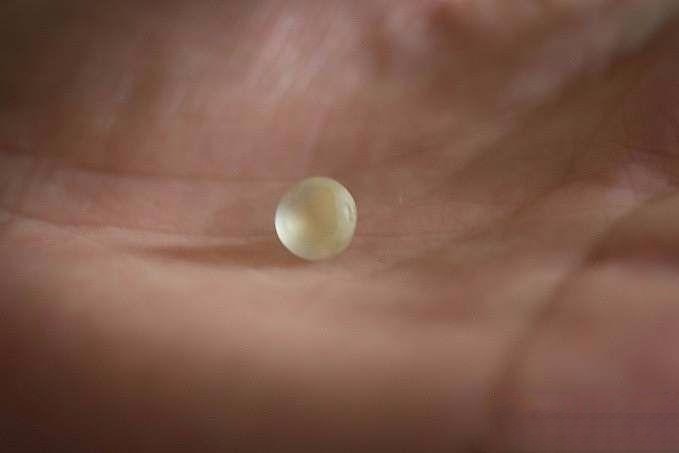
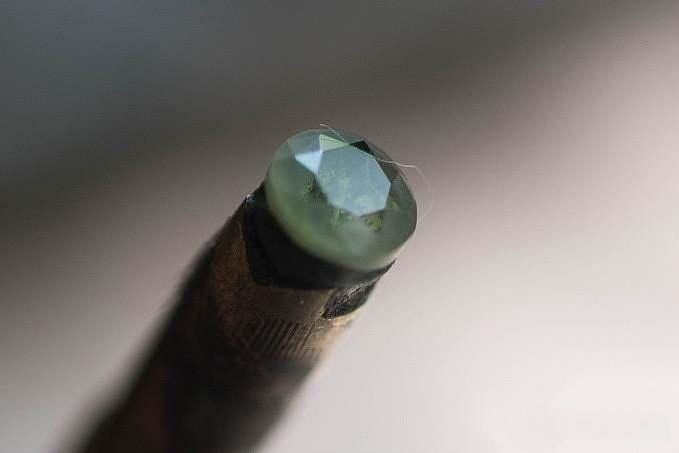
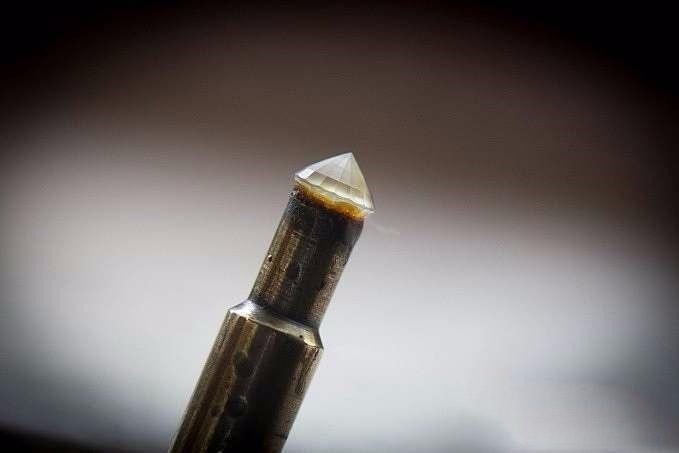
The gemstone we’re featuring today is a natural, unheated yellow sapphire from Sri Lanka, weighing 3.64 carats in its rough form. (See image above.)
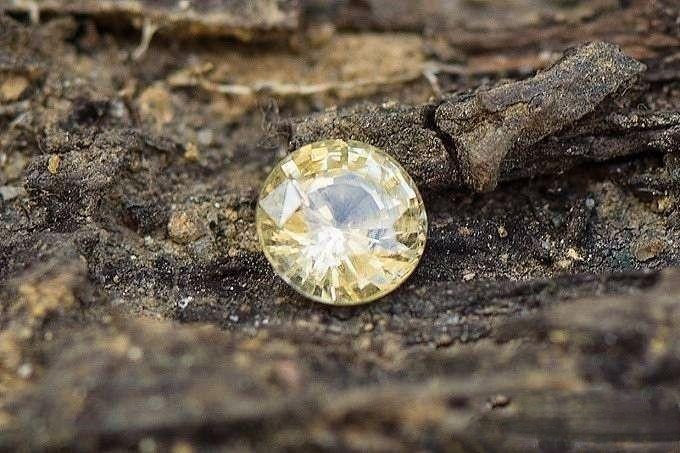
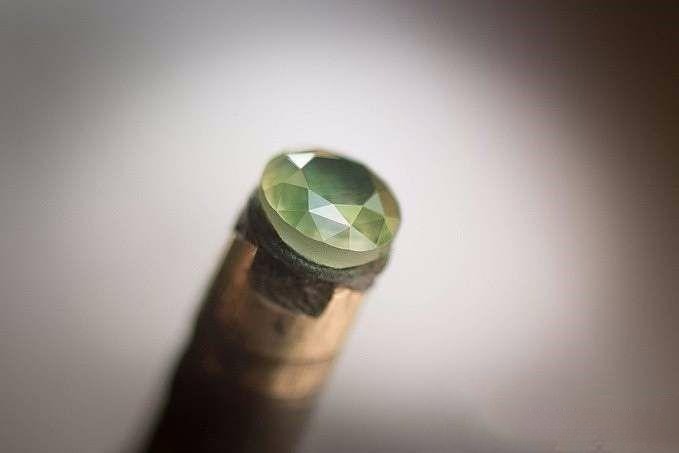
Typically, natural unheated yellow sapphires display low color saturation, resulting in a slightly pale tone. However, after the cutter skillfully shapes and polishes the gem — a process taking about an hour and a half — it now gleams with remarkable brilliance and depth. (See image above for the finished cut.)
So, how did this modest piece of rough sapphire transform from an ugly duckling into a beautiful swan? Let’s uncover the journey together.
Overview of Gemstone Cutting Steps
The complete cutting process typically includes four stages:
- Design
- Shaping (Preforming)
- Faceting
- Polishing
Let’s take a closer look at each stage.
Step 1: Gemstone Cutting Design – Visualizing the Final Facet
Before the first cut, the gem cutter carefully studies the rough stone’s shape and internal characteristics, determining the orientation of the table and the intended final cut.
This particular sapphire had a large surface and sufficient depth, making it an excellent candidate for a round cut.
Cutting requires not only experience but also a keen eye and a three-dimensional vision. A skilled cutter first envisions the final gemstone long before making the very first facet. This clear visualization guides every step of the cutting process.
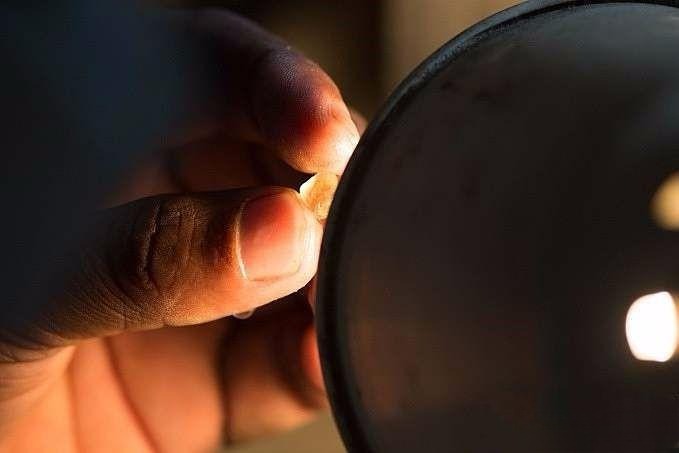
Next, the cutter cleans the rough stone thoroughly and immerses it in water. By examining the gem under bright light, the cutter identifies any internal inclusions, cracks, or feather-like patterns. Detecting these features in advance is essential to avoid damage and plan precise cutting angles that maximize brilliance.
Step 2: Shaping the Rough Stone – Preparing for Gemstone Cutting
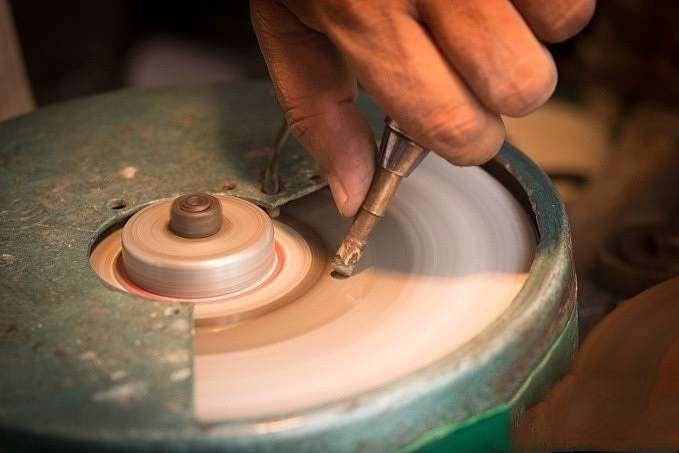
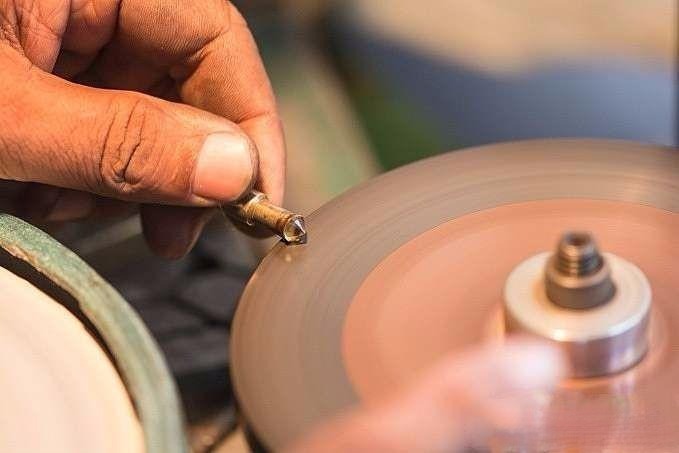
After evaluating the stone, the cutter begins to remove excess material, gradually revealing the outline of the planned shape.
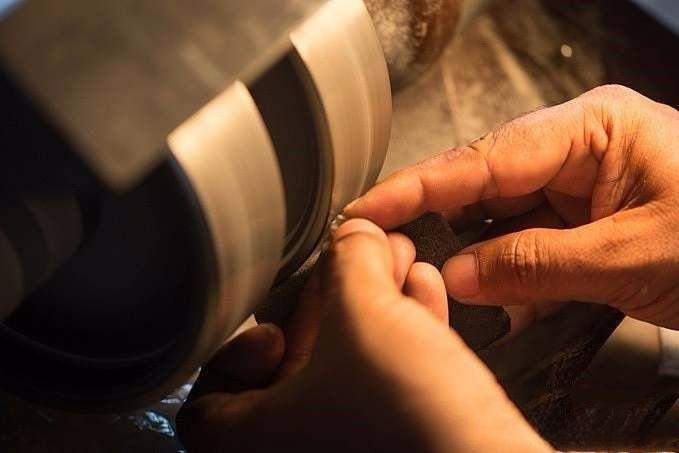
The cutting machine has two grinding wheels:
- The right wheel is coarse, ideal for removing unwanted material.
- The left wheel is finer, used for precision shaping.
As the wheel spins rapidly, holding such a small stone requires exceptional steadiness and skill. The cutter frequently pauses to examine the shape and ensure that inclusions and uneven areas have been removed.
Within minutes, the rough begins to resemble a round shape — still far from finished, but already showing potential.
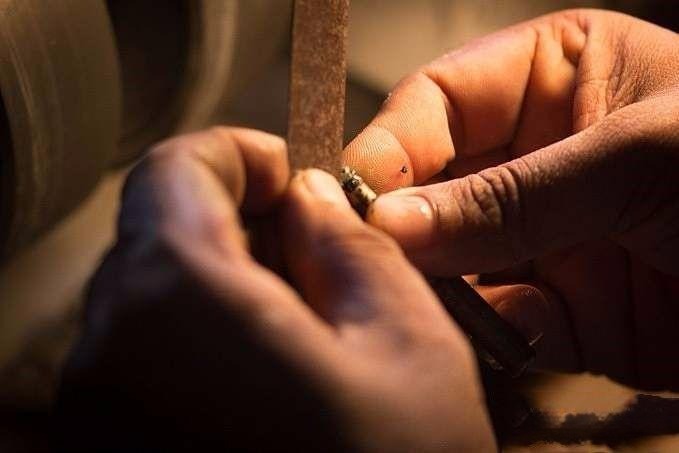
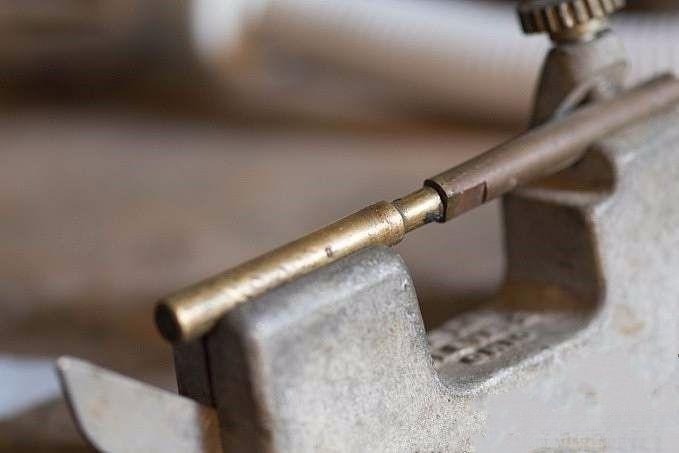
Mounting the Stone on a Dop Stick
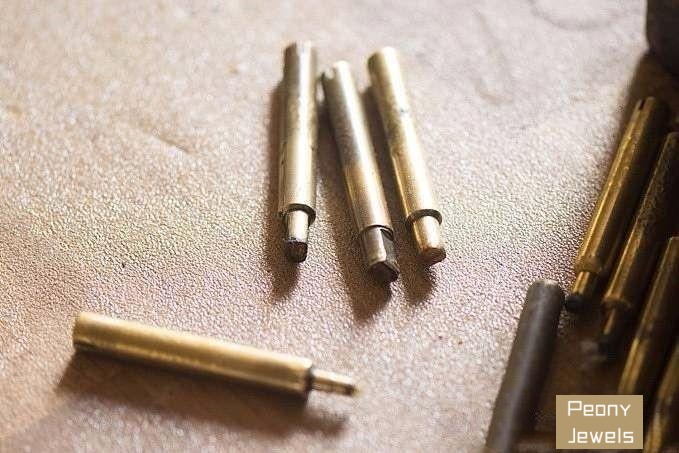
Because gemstones are too small to hold directly by hand, the cutter secures the gem using a copper dop stick and a special adhesive wax. This ensures both precision and stability during the shaping process.
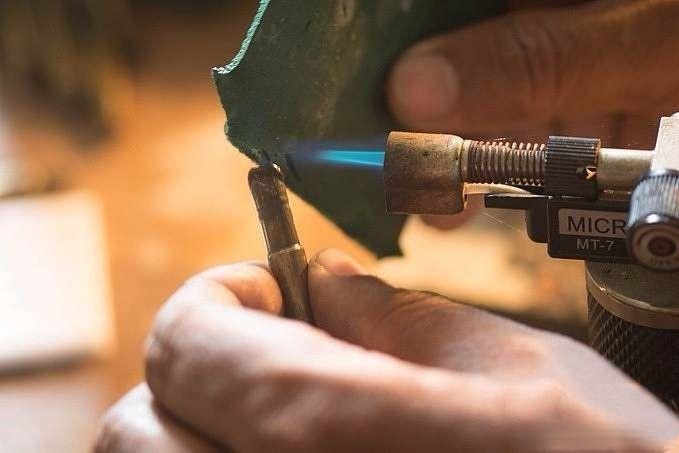
- First, the cutter melts the wax and applies it evenly to the top of the dop stick.
- Next, they position the gemstone carefully, adjusting the angle until it sits perfectly centered.
- Finally, the cutter removes any excess wax to ensure the gem is firmly fixed and ready for precise grinding.

Pro Tip:
Each gemstone has a different heat tolerance, and so does the adhesive wax. Therefore, it’s important to choose the right type of wax based on the gem’s physical properties to avoid heat damage.
Once mounted securely, the gem is ready for further shaping and refinement.
Step 3: Faceting and Polishing – Bringing the Gemstone to Life
With the preform completed, it’s time to cut and polish the facets that will define the gem’s brilliance.
While faceting and polishing are usually separate steps, my mentor often performs them together — every cutter has their own rhythm and method.
A Quick Lesson on Gemstone Cutting
Each gemstone type has specific optical properties that determine its ideal cutting angles.
The right angles ensure maximum light reflection within the stone, producing that mesmerizing sparkle that makes gemstones so enchanting.
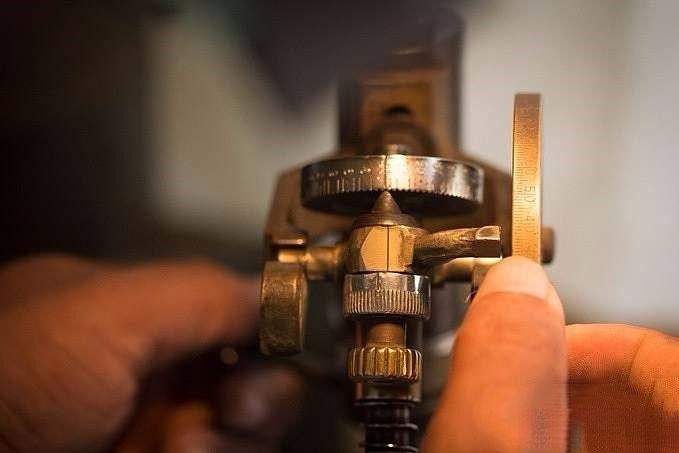
Crown Faceting
- The angle is set to 34° 62′ to begin cutting the main crown facets.
- The indexing gear is adjusted to control symmetry.
- Each facet is rough-cut on the lap wheel.
- Soon, the crown facets start taking shape.
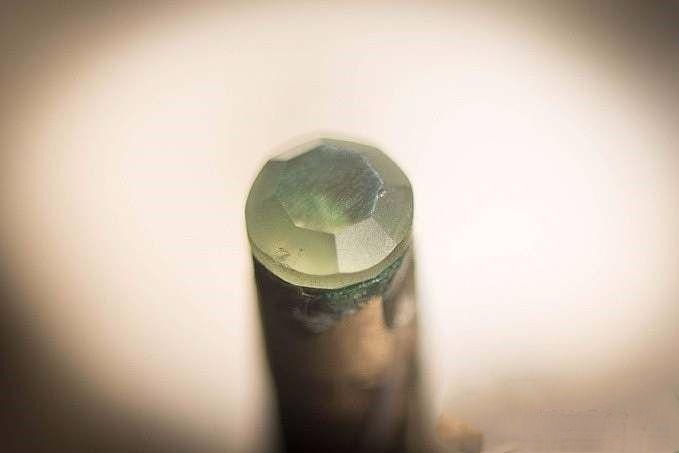
Most round stones have a single crown, but cutters in Sri Lanka often prefer adding a double crown to enhance brilliance. My mentor chose this approach — and the result is truly stunning.
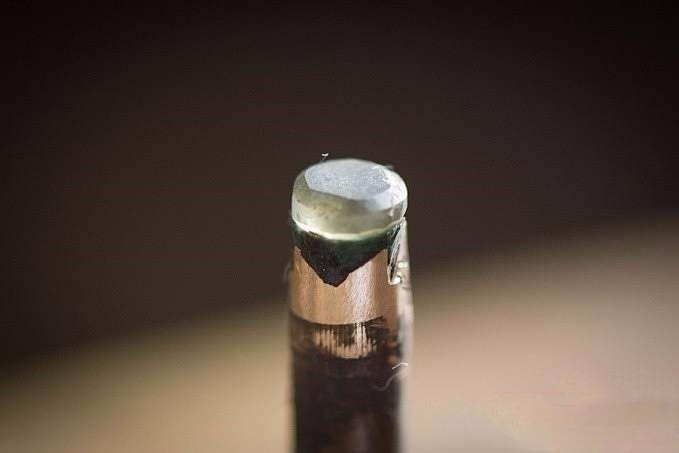
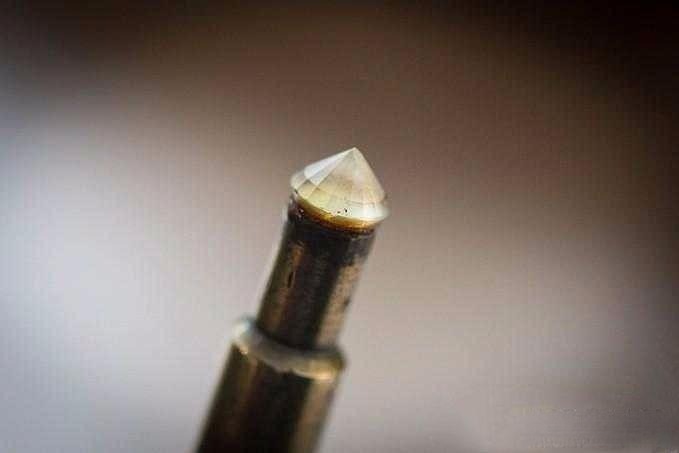
After faceting, the gem’s surface appears slightly frosted — like fine sugar — before polishing.
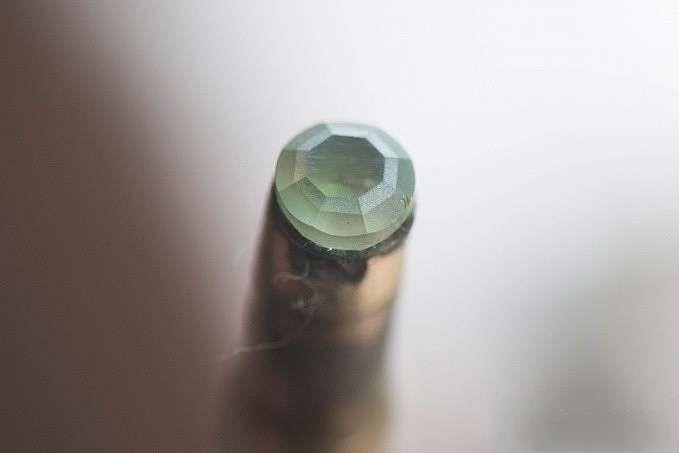
Next, the small triangular star facets near the table are cut and polished, revealing a mirror-like shine.
Within minutes, the entire crown gleams beautifully. The gem looks crystal-clear, as if we’re gazing into a tranquil, transparent lake.
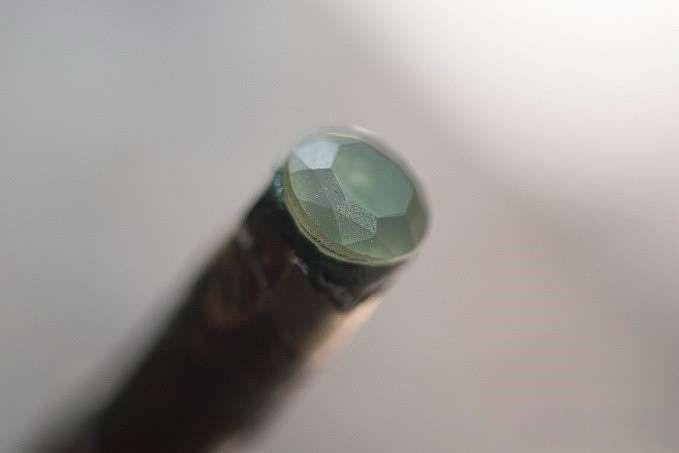
Pavilion Faceting
- The dop wax is gently reheated, and then the gemstone is repositioned so the pavilion (bottom) faces upward.
- Next, the gem is aligned horizontally with the culet centered precisely.
- Once aligned, the cutter carefully shapes the pavilion facets one by one.
- Afterward, each facet receives a meticulous polish.
- As the first polish completes, the improvement becomes instantly noticeable.
- Finally, the second polishing enhances the gem’s transparency to a breathtaking degree.


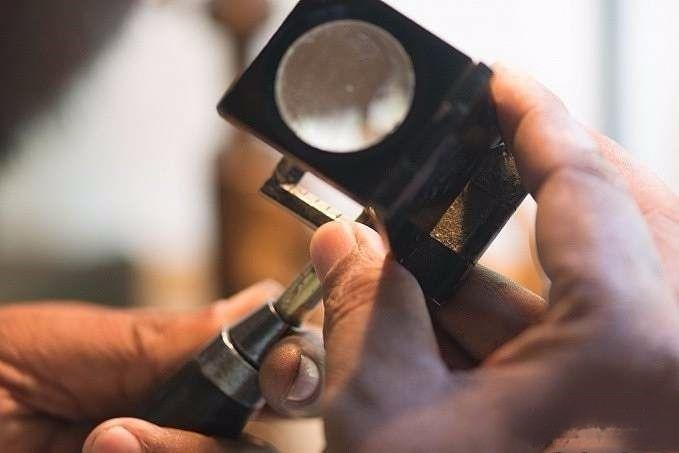
Throughout this stage, the cutter uses a magnifier to ensure every facet remains symmetrical and perfectly aligned.
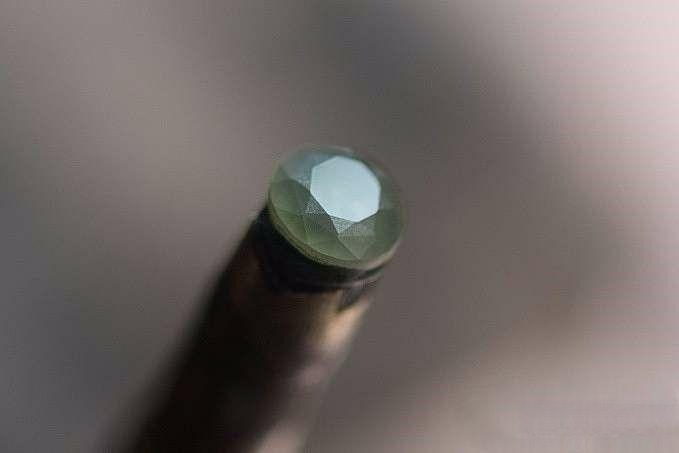
Girdle Polishing – The Final Touch
After polishing the pavilion, it’s time to refine the girdle — the thin edge dividing the crown and pavilion.
This step is critical for both optical performance and durability. A perfectly polished girdle allows light to refract cleanly within the stone, enhancing its brilliance.
With delicate pressure and careful motion, the master polishes the girdle to perfection. Poorly cut stones often have girdles that are too thick, too thin, or uneven — all of which reduce sparkle.

Finally, the masterpiece is complete.
From a 3.64-carat rough to a 1.38-carat finished gem, the transformation is extraordinary.
Reflections from the Peonyjewels Studio
“Many people admire gemstones for their size or color,” says the Peonyjewels artisan.
“But to me, cut quality is just as important. Not every buyer recognizes the value of a fine cut — but a perfect cut demands more time, more effort, and immense expertise. There are countless gems in the market, but truly well-cut stones are rare. As always, good things are never cheap.”
For readers who want to dive deeper into this topic, check out our Peonyjewels blog related article:
How to Grade Gemstone Quality: Understanding the 4Cs and the Importance of Gemstone Cut Quality.
Conclusion – From Raw Beauty to Refined Art
The journey of a gemstone — from rough to radiant — is a story of craftsmanship, patience, and artistry.
Each polished facet is not merely a reflection of light, but a reflection of human dedication.
At Peonyjewels, we celebrate this devotion in every creation — from gemstones to jewelry.
Discover our collection of handmade vintage earrings and other timeless designs that capture the same spirit of elegance and precision found in every beautifully cut gem.